
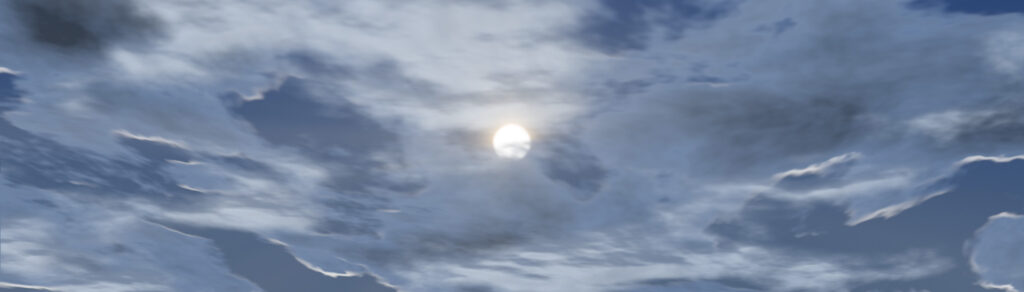
Sky is an After Effects plugin that creates animated skies. The clouds have 3D-looking shading lit by a sun you can move, and they loop seamlessly. Sky can draw its own sky behind the clouds, or render clouds alone with transparency to place over your own footage. It can also render seamless-looping twinkling stars for a night sky.
Contents
- Getting started
- Presets
- Render
- Cloud Shape
- Coverage Map
- Surface Texture
- Lighting
- Sun Disc
- Lightning
- Sky
- Stars
- Animation and looping
- Layer set script
- Licence and trial mode
- GPU rendering and performance
- Tips and troubleshooting
Getting started
- Create a new solid the same size as your comp (Layer > New > Solid).
- Apply Effect > Bearman > Sky to the solid.
- Try the two preset menus at the top of the controls for a quick-start setup
The controls are in collapsible groups. Click the triangle next to a group name to open it.
Presets
Two menus at the top of the controls fill in the settings for you:
- Cloud Type Preset sets the cloud shape
- Sky & Lighting Preset sets the sun, lighting and sky colours
Each preset only changes its own settings, so you can combine any cloud type with any sky. Adjust the settings afterwards, or use Undo to go back. The menu returns to “Choose Preset…” after use: presets are a starting point, not a setting that stays attached.
Presets never change the animation settings or the Sun Disc.
Render
Four checkboxes at the top of the controls choose which elements Sky draws. Everything is on or off independently, so you can render the sun, the stars or the clouds on their own layer and add glow, shine or grading to each in your comp.
| Control | What it does |
|---|---|
| Sky | The built-in sky gradient (on by default). Turn it off to get a transparent background, to place over your own footage. |
| Stars | The starfield (off by default). Set it up in the Stars group. |
| Clouds | The clouds (on by default). |
| Sun Disc | The sun disc (off by default). Set it up in the Sun Disc group. |
Clouds that are switched off are invisible but still hide the sun and the stars, exactly where they would have. That is what lets you split a shot into layers (clouds, sun, stars) and put them back together without the sun or stars showing through clouds.
To render the sun or the stars on their own layer: turn Sky and Clouds off and leave only that element on. The result has a transparent background.
Cloud Shape
| Control | What it does |
|---|---|
| Cloud Scale | Size of the clouds. Higher values give larger clouds. |
| Cloud Coverage | How much of the sky is cloud, from clear (0%) to fully overcast (100%). |
| Cloud Softness | Hard, crisp cloud edges (low) or soft, diffuse ones (high). |
| Cloud Detail | Smooth, rounded clouds (low) or rough, textured ones (high). |
| Cloud Turbulence | How much the cloud shapes are twisted and distorted. |
| Turbulence Scale | How broad those distortions are. Set it larger than Cloud Scale for broad, natural-looking swirls. |
| Cloud Aspect | Stretches the clouds sideways, as clouds look when you view them towards the horizon. |
| Perspective Warp | Makes the clouds smaller towards the bottom of the frame, faking the perspective of a sky receding to the horizon. |
| Volume | Makes the clouds rounder and puffier. At 0% the shading is unchanged. As you raise it, each cloud is shaded as a cluster of soft round lobes: bright on the side facing the sun, shading one another where they overlap, with a soft shadowed underside. Above 100% the light wraps further round each lobe and the thick, sun-averted side darkens, for a heavy cumulus look. It only changes the shading, not the shape or coverage of the clouds. Surface Texture still adds its fine grain on top of the rounded shapes. Rendering is slower with Volume above 0%. |
| Lobe Size | How big the round lobes are when Volume is on, relative to the clouds (100% is the default). Lower values give many small, tight lobes; higher values give fewer, bigger, smoother ones. It has no effect while Volume is 0%. Set it once rather than animating it, as moving it makes the lobes swim across the clouds. |
| Cloud Opacity | Controls the transparency of the clouds (including the amount they obscure the sun and stars). |
| Random Seed | Each number gives a different, repeatable arrangement of clouds. Step through seeds to find a formation you like and keep it. |
Coverage Map
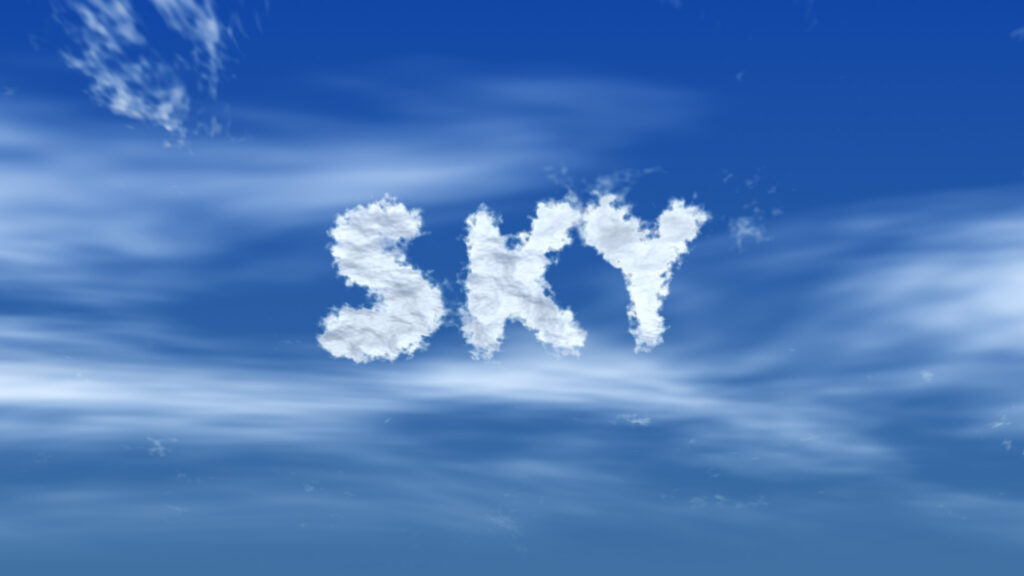
A coverage map uses another layer to decide where the clouds form: use this to create specific shapes in the clouds – text, a logo, or a few soft blobs where you want clumps of cloud. The clouds grow into the white areas and thin out in the black ones. They do this along their own natural edges, so the shape reads clearly without looking cut out.
| Control | What it does |
|---|---|
| Coverage Map Layer | The layer to use. None (default) turns the map off. |
| Map Channel | Read the layer’s brightness (Luminance) or its transparency (Alpha). Alpha suits text and shape layers. |
| Invert Map | Swaps inside and outside. |
| Coverage Inside | The amount of cloud Coverage where the map is white. |
| Coverage Outside | The amount of cloud Coverage where the map is black. While a map is in use, these two replace Cloud Coverage. |
| Map Softness | How far the effect reaches past the shape’s edge, as a percentage of the frame height. Low values give a crisp shape and high values a looser, more natural one. |
| Edge Breakup | Roughens the shape’s outline so it billows like cloud. |
| Breakup Scale | Size of those billows, in the same units as Cloud Scale. |
- The map layer is always stretched to fill the frame, and its own position and scale are ignored. The easiest approach is a precomp the same size as your comp, with your shape laid out inside it.
- Soft, wispy cloud types may need a lower Coverage Inside.
- Keep the shape above the area faded by Cloud Horizon Fade (or lower that setting), so the bottom of the shape isn’t faded away.
Surface Texture
Cloud Detail changes the outline of the clouds but not their body, so the middle and underside of a cloud can look very smooth. Surface Texture adds fine grain over the body, the way real cloud undersides look in photographs. It only changes the shading: the cloud’s shape, edges, silver lining and horizon fade are not affected, and it loops and animates with the clouds.
| Control | What it does |
|---|---|
| Texture Amount | How strong the grain is. 0% turns it off completely. Around 20–60% looks natural; above that it becomes clumpy. |
| Texture Scale | The size of the grain: 3 gives broad lumps, 10 gives fine grain (default 6). |
| Underside Bias | Concentrates the grain on the side of each cloud facing away from the sun, and keeps the sunlit tops smooth. 0% spreads it evenly over the whole cloud. |
- The texture shows best with a low sun. With the sun high overhead the clouds are lit almost evenly, so the grain is faint, and Underside Bias has less to work with.
- It adds roughly a quarter to the render time while it is on. Set Texture Amount to 0% to switch it off.
Lighting
| Control | What it does |
|---|---|
| Sun Elevation | Height of the sun above the horizon, in degrees (−15 to 90). Below 0 the sun has set: only the Sun Disc responds, and the cloud lighting holds at horizon level. |
| Sun Azimuth | Compass direction of the sun, in degrees. Keyframe Elevation and Azimuth to move the sun. |
| Sun Colour / Sun Intensity | Colour and strength of the sunlight on the clouds. |
| Ambient Colour / Ambient Intensity | Fill light from the rest of the sky, reaching the shadowed sides of the clouds. |
| Silver Lining Intensity / Colour | The glowing rim on cloud edges. |
| Silver Lining Sun Response | Makes the rim react to the sun: edges facing the sun glow most and edges facing away fade. 0% gives an even rim all round. The effect lessens as the sun climbs overhead. |
| Shadow Depth | How strongly thick cloud is darkened. This is what gives the clouds their 3D volume. |
| Shading Contrast | The range between the lit and shadowed parts of the clouds. |
| Cloud Base Colour | The colour of the cloud itself before lighting. Darken it for storm clouds; a cool grey reads well for moonlit cloud. |
Sun Disc
Turn on Sun Disc in the Render group to draw the sun itself as a disc, for sunrises and sunsets. Its position comes from Sun Elevation and Sun Azimuth, so the sun and the lighting always agree: keyframe Sun Elevation and the sun sets.
| Control | What it does |
|---|---|
| Sun Disc Size | Size of the disc, in degrees. |
| Sun Disc Softness | Softness of its edge. |
| Sun Disc Intensity | Brightness. Above 100% goes brighter than white in a 32-bit project, which glow effects respond well to. |
| View Direction | The compass direction the frame is looking towards. Set it close to Sun Azimuth to bring the sun into frame. |
| Field of View | How wide the view is, in degrees. Together with View Direction, it places the sun on screen. |
| Create Sun Position Null | A button that adds a null layer called “Sun Position” to the comp. Its Position follows the sun disc exactly. Parent or link other layers and effects to it (for example a lens flare or glow light source) to track the sun. |
The disc sits behind the clouds and is hidden by dense cloud, even where the horizon fade has made that cloud look thin. It shows through gaps and thin cloud, and is hidden below the horizon line.
Lightning
Lights the clouds from inside, as if lightning were flashing within them. You set the flash timing by keyframing Lightning Brightness. At 0% (the default) there is no lightning.
| Control | What it does |
|---|---|
| Lightning Position | Where the flash is. Drag the point in the Composition viewer. |
| Lightning Radius | How far the light reaches, as a percentage of the frame height. |
| Lightning Brightness | Strength of the flash. Above 100% goes brighter than white in a 32-bit project. |
| Lightning Colour | Colour of the flash. |
| Thin/Dense Response | Thin cloud glows more than dense cloud, like real lightning behind cloud. This sets how strongly. 0% gives an even, round glow, which looks more like a lamp. |
Short video: a storm sky with a few lightning flashes.
Sky
| Control | What it does |
|---|---|
| Sky Zenith Colour | Colour at the top of the sky. |
| Sky Horizon Colour | Colour at the horizon. |
| Sky Ground Colour | Colour below the horizon. |
| Horizon Position | Height of the horizon, measured up from the bottom of the frame. |
Stars
A field of stars for night scenes, drawn over the sky and behind the clouds and the sun disc. Switch them on with Stars in the Render group. Star sizes are in pixels at a 1080-line frame, so the look does not change with the comp size or the Resolution setting.
| Control | What it does |
|---|---|
| Star Density | How many stars. Raising it only adds stars; the ones already there stay where they are. |
| Star Random Seed | Each number is a different, repeatable arrangement of stars. Independent of the cloud Random Seed. |
| Star Size | Size of a typical star. |
| Star Size Variation | 0% makes every star the same. Higher values give a few big, bright stars among many faint ones. |
| Star Brightness | Above 100% goes brighter than white in a 32-bit project, which glow effects respond well to. Stars have no glow of their own: add one in your comp with a glow effect. |
| Star Colour | Tint of the stars. |
| Twinkle Speed | How fast the stars twinkle. 0 holds them still. Stars twinkle by changing size, and the twinkle repeats exactly over Loop Duration, so it loops seamlessly. Speed is rounded to whole twinkles per loop, so keyframing Twinkle Speed (or Loop Duration) makes the stars jump. |
| Twinkle Amount | How far the stars shrink when they twinkle. |
| Star Horizon Fade | Stars fade out over this much of the frame height above the horizon, and there are none below Horizon Position. |
Making a night sky: turn on Stars, then use the Moonlit Night or Dusk presets (or darken the three Sky colours yourself) so the stars stand out. Clouds drift in front of the stars and hide them where they are dense. To fade stars in at dusk, keyframe Star Brightness rather than Twinkle Speed. For a glow around the stars, render them on their own layer (turn Sky and Clouds off) and add a glow effect, or raise Star Brightness above 100% in a 32-bit project.
Stars are fixed to the frame and do not drift with the wind. They keep their positions at any comp size or Resolution setting. Twinkle Speed is shown so that 1 is the gentle default; the stars still loop exactly with Loop Duration.
Animation and looping
| Control | What it does |
|---|---|
| Loop Duration | Length of one seamless loop, in seconds (default 30). At the end of the loop the clouds return exactly to how they started. Set it to match the length of the loop you want. |
| Evolution Speed | How much the cloud shapes change over the loop. 0% keeps the shapes fixed. |
| Wind Direction / Wind Speed | Which way and how fast the clouds drift. Wind Speed goes up to 1000% for timelapse-style movement. |
| Noise Offset X / Y | Moves to a different part of the cloud pattern, without animating it. |
| Dither Strength | Adds very fine noise to prevent banding in smooth gradients, especially after video compression. |
| Seamless Drift | Makes the wind drift loop as well, so the whole animation loops perfectly (on by default). It takes longer to render. With it off, the clouds keep drifting and the loop only applies to their changing shapes. |
| Cloud Horizon Fade | How far above the horizon the clouds thin out to nothing. |
Layer set script
The Sky – Create Layer Set script (Sky_CreateLayerSet.jsx, included with the download) builds a ready-made set of layers for compositing a sky in separate passes, so you can add glows, grades and other effects to each one. Open a composition, then choose File > Scripts > Run Script File (or put the script in After Effects’ Scripts folder to run it from the File > Scripts menu).
It adds four comp-sized solids, each with its own Sky effect, from top to bottom:
- Sky – Sun: the sun disc only.
- Sky – Master Clouds: clouds only. Everything else is linked to this layer, so set up your main cloud look here.
- Sky – Secondary Clouds: clouds only. Its lighting follows the master, but the cloud shape is free, so you can make different clouds for depth and variety (it starts with a different Random Seed and wind speed to the master layer). Bear in mind this layer doesn’t occlude the sun – only the master clouds layer will do that.
- Sky – Gradient: the sky gradient only. Its Stars controls are linked too; tick Stars in the Render group to use them.
It also adds a Sky – Sun Position null above the layers that follows the sun disc, ready for a lens flare or glow.
Linked controls show an expression and are controlled from the master layer; to make one different, delete its expression (alt-click on the stopwatch). Keep the layer names as they are, because the expressions find the master by name. The Coverage Map Layer cannot be linked, so if you use a map, choose the same layer on the Sun and Gradient layers.
Licence and trial mode
The Licence group at the top of the effect shows your licence status.
- Enter Licence Key: activate Sky with the key from your order confirmation or your account’s My Licences page. This needs an internet connection.
- Deactivate: frees this computer’s activation so you can use it on another computer.
- Activate Offline: for computers without an internet connection.
One licence key works on Windows and Mac, on two computers in total. Without a licence, Sky runs in trial mode: everything works, but the output is watermarked.
GPU rendering and performance
Sky renders on your graphics card (GPU) when After Effects is set to use one. It falls back to the processor (CPU) automatically.
- Windows: NVIDIA cards through CUDA, and AMD, Intel or NVIDIA cards through OpenCL.
- Mac: Metal.
To choose, go to File > Project Settings > Video Rendering and Effects and pick a Mercury GPU Acceleration option. The Help button in the effect shows which renderer drew the last frame.
Seamless Drift roughly doubles the render time. Turn it off if you don’t need the drift to loop.
Tips
- Use a reference image of a real sky as a guide to help you create more realistic looking skies
- When making looping cloud footage, longer loop durations will look more realistic and feel less repetitive.
Troubleshooting
- The loop jumps when it repeats. Check that Loop Duration matches your loop’s length, and that Seamless Drift is on if the clouds are drifting.
- I want clouds over my own footage. Turn off Sky (in the Render group) and place the Sky layer above the footage.
- I can’t see the stars. Turn on Stars in the Render group, check Star Density and Star Brightness, and remember that stars are hidden by clouds and by the bright daytime sky: darken the sky colours or use a night preset. They are also absent below Horizon Position.
- Reporting a problem: click About Sky… in the effect and choose Yes to write a dignostic log file (the dialogue shows where it is saved)
Still stuck? Please get in touch, and include your After Effects version, your operating system, a description of the problem and generate a log file (see above). A screenshot or screen recording demonstrating the issue can be really helpful for troubleshooting problems.